1969-1/2 Dodge Super Bee


Muscle cars. For a car to be classified as such, it needs to have a motor that makes old ladies cry, young ones weak in the knees, and sends all of one's nerve endings on stimuli overload. In 1969, inhibitions ran wild. So did boobs! To celebrate this decade of Sex and Vibration, Dodge came up with a knock-out package that really put the D-Cells in and hit the switch to "high". The A12 package was born and it was a half year special only available on Dodge Super Bees and Plymouth Roadrunners. This my Bee, and it took me a few years of badgering and nagging to finally get this particular car. As you can see, I was so excited I had to get a picture of the first time I touched it!!


The cool thing about this car is it has 53,000 original miles and still has the original warranty books, warranty book plastic protector sleeve, Broadcast sheet, and title from 1969!! The original owner resides in Florida and I know the stories behind every dent, ding, and issue the car may have. Pretty cool!! Not many classics around that have this type of history, let along one of this pedigree.


Here's Reliable Carriers pulling up to load the car onto the trailer and deliver it to the Muscle Car and Corvette Nationals November 22-23. The car is going into the Barn Find/Hidden Gems section and I'm really excited about being part of such an elite show. Hopefully next year I can have the car done so it'll be back on display, but this time freshly restored.

On the road again! Last time is was on an enclosed carrier it was coming to me from NY. Now it's headed back out to be on display. Reliable is TOP NOTCH!!!

Steve, the driver, lives right down the street from me. So this was pretty convenient. Next stop, Chicago!!!! Coolest thing about the show? I entered my wife into the amateur modeling contest with the hopes of wining a cover shot on Mopar Collector's Guide magazine. How cool would that Bee!??!? Here's two shots of her by the Bee. She was picked as a finalist, so she'll be having a photo shoot with the professional photographer at the show! Fingers crossed she wins! We have a few really nice late 60s style dresses with Go-Go boots for her to wear. She'll fit right in!!


The show was great! This photo was taken by Allpar.com photographer Marc Rozman. What a great time and the car's now ready to get restored. But first, a real treat and a RARE opportunity to boot.

This is me with Gary Burgess, the original owner of my Bee!!!!! I know!! Unbelievable!!!


Here's Gary sitting in his car for the first time since I think about 1999. What a very cool thing to see. I was pretty excited to have him out and hear all the stories about the car. An extremely rare opportunity and I just love the fact that he now watch the restoration start on his old car.

"So, I'm on Woodward Blvd, and a guy in a 427 Vette pulls up......" :-) Ah the stories!!!

Taking him for a nice spin, which of course, meant I had to spin the rubber a bit!

...and a spin em' I did!!! :-)

So here's Gary removing the air cleaner with me, and this has now started the restoration. I'll be returning to the Muscle Car and Corvette Nationals next year with the car done and Gary will help me reinstall that air cleaner and that will call the restoration complete

What a great photo. The original owner by his car. Priceless!!!


And it begins. Normally, I can have a B-Body Mopar torn down in about a day or two. This one is taking a bit longer since I'm documenting everything and taking a ton of pictures for reference. Small stuff like what washer is where, what bolt head marking is one what bolt holding what piece on. Tedious, but worth it.

Everything is just about disconnected, and I'm just about ready to lift it out.


Here's the big lift! I've done this with every Mopar I've built and it's the only was to go. In essence, I am trying to mimic on a smaller scale what the factory did. They dropped the body down onto the drivetrain. This does two things for me: It makes the whole process easier for me being a one man show, and once the car is painted it reduce the chances of scratches on reassembly. I made my own cradle for the engine/trans/suspension assembly, as well as the bumper mount hoist.

The first major step accomplished! Any casualties? Happy to say, NONE! Next week I'll start in on the rear axle removal. SO MUCH FUN!!!!! More to come....

Jacks are a man's best friend. Here they pull double duty by allowing me to lower the axle out of the Bee and pull it out from under the car. With this out, I removed the exhaust and bolted on the rear dolly I made so now the Bee is totally mobile in case I need to move it out of the way. Once down to a shell, I'll mount it on the rotisserie and jam it over to the blaster.

This is the stuff that I need to photograph, and although trivial, makes for the correct restoration. It's boring to most, but fascinating to me! What you see here is the trunk hinge with the plastic rectangular bushing and a smattering of grease. But what's important to note is the grease is painted! This tells me how to reassemble the car. The decklid was installed, greased, and then the car was painted....grease and all! And here's something else cool.....

I found this "Factory O.K." tag hanging inside my driver's side quarter window!!! How freakin' cool is that? Why do I keep asking that question when I know the answer? COOL!! This tag has been here since May 22, 1969 as indicated by the date written on it. Of course I'm going to make a tag to replicate this one, and then reinstall it back in the car. But here's a few neat things about that tag:
.jpg)
The tag has V2 Hemi Orange paint on it as well as some undercoating spray on it which was applied to the inside of the rear quarter panel. So this tag was hanging in the car prior to all of this being done. The date is 5-22-1969, and my car is from the batch of 4-26 cars. I'm still researching what this tag is and what it means. So more to come on this.

Interior is all out, and I'm ready to pull the dash. I should have the car down to the unibody by the end of the month and on the rotisserie. Maybe I'll find some more tags!!!!!


Just about ready to pull the dash out, and I found another factory marking I hadn't seen before. Before the vinyl top was put on, the workers put yellow chalk marks on the window pinch weld to indicate where the screw holes were for the reveal molding clips! The yellow hash mark is at every intersection where there is a clip. I know, boring, but COOL!!!!!!


And when I removed the screws, they are in such good shape that they still have the blop of sealant used on the threads to seal against water! The pic on the left is a close up of the screw with the sealant blop, and the right is a picture under the trunk filler panel between the rear window opening and trunk opening. Those screws are the ones that hold in the rear window lower reveal molding. All showing the sealant blop on the ends!!!!

Dash out, and I'm working on breaking down the doors. I think I'm up to about 600 photos right now of every angle, every where a wire was anchored, and all the connections so I can be sure everything gets routed back the same way. The dash wiring harness is in mint shape due to low miles, being stored inside, and no mice!

Another factory blunder. Something cool is that usually this manual transmission bracket was two studs with nuts on the end. As you can see, the factory worker snapped the bolt when installing it, hammered it back, then just used a nut/bolt combo for the upper support of the pedal quadrant. You can see the V2 paint on the bracket's bent part too. It's documented, and will be restored exactly like that.


Well, 350 baggies, over 500+ photos, and about 22 boxes of parts and it's all ready to be sent off to the blaster! First though, I'll mount it on the rotisserie and take some very detailed undercarriage, undercoating, and bare shell photos to document more stuff. I'm very happy with the condition, but I will need to replace a rear crossmember that I wasn't planning on doing. Oh well, Michigan winters will do that!


On the rotisserie and it'll be off to the blaster in a few weeks. Once it's back, I'll prep the body and get it into epoxy primer. Then I'll start into the metal work. Fun stuff on the way!!! So what's next? Glad you asked! I'm going to tear down the front suspension and then start the component restoration. My goal is to restore all the individual components (suspension, engine, rear, dash, etc) and the body will be the last thing done. Once that is painted, the car will go back together quickly since all the other parts are done and on the shelf awaiting to be bolted on. Of course, I need to start ordering parts too. That's the best part!!! Well, for me it is. Not for my wallet. I'm accepting donations. Give often!!!


There's just nothing easy about removing the old original undercoating. A hand held propane torch and a scraper is the only was to get this stuff off. Even the sandblaster can't remove it! As you can see by the pile of scraps, the car is devoid of all the old goo. Luckily, this was a non-undercoated car so the floor pans don't have it. All cars got it in the wheel wells. If the floors were coated it would make this project triple the pain in the a$$ that it already is! So now I'm ready to drop it off and have it blasted. Meanwhile, time to dive into the front suspension.

The engine and transmission is stripped down to the long block, and now I'll be working on detailing up all the individual components. As you can see, the front suspension is also torn down with just a stubborn strut rod to press out of the one lower control arm. Then it's onto busing removal and then blasting. I did find a cracked exhaust manifold that I'll see about having welded up. Cast iron welding is very specialized, so I need to find a guy who can save the manifold since it's date coded correct for my car.


Markings, drips, blops, dabs...they all mean something and with Mopars, they're all over the darn place. Despite the rust and corrosion on some parts, others are untouched and markings are nice and clear. All of this will get replicated when I reassemble the car. Case in point, the torsion bars up front. See those dried drips? These were dunked in black paint then laid horizontal to dry which resulted in dried drips! And the k-member after power washing revealed a yellow inspection mark where the idler arm gets installed.


Moving onto the front suspension, all the castle nuts got a blop of red paint after being set and the torsion bar adjuster arm has orange paint on the end portion. The other side has a larger blop which extends onto the side of the arm. Neat stuff! Also, you can see the special steel spacers used with the A12 cars when using the large G70 Goodyear Redlines to provide a little extra clearance if the suspension bottoms out. Maybe from lifting the tires off the ground when your flogging some Chevy! HA!

Slow going, and tedious, but this is a month's work tearing all this down, cleaning, and documenting. Here's one of the lower control arms scrubbed clean and the lower bushing pressed out. Once all the suspension parts are cleaned and prepared I'll start the finishing process.

A freshly painted engine! I spent the last few weeks cleaning up the motor, and since it was a fresh build, nothing needed to be torn down. Just detailed up. So, out comes the reference materials! Dodge motors, and I think all Chrysler engines for that matter, were painted with exhaust manifolds on, if it was a 4spd, the bellhousing was installed, intake, valve covers, etc. So to mimic how all this looks when brand new, overspray is all over the place. It seems a real shame to do it, but to be correct, it has to be done. I prepped the bare steel transmission, left it natural cast iron, and then added the factory markings. the "605" is the part number for the Hemi 18-spline transmission that all A12s got when equipped with a 4-speed. The other markings are inspection marks.


Proper overspray on the bellhousing, and the clutch fork also got overspray. Engine markings are a black grease pen "0" on the left valve cover which indicates what throttle mounting bracket to use (0 means 4spd, and a 5 means automatic. It's the last number in the braket's part number). Right valve cover gets the engine code's last three digits, "949" for a 4-speed, and a "950" for an automatic. The which letters you see on the left side of the block are piston size reference letters. Each cylinder is measured from a standard and if it's larger or smaller, then a reference letter is used on that cylinder so the engine assembler knows what sized piston to get for that particular cylinder. This is actually done on the bare block (not the painted block like here) but to make it appear "ghostly" like the markings are under the paint, I will be overspraying this part of the engine with a lighter coat of paint. Tedious and crazy!!! But that's what makes it so much FUN!!!! OK, reassembly of the engine continues later this month.

Continuing with the small details, the oil pan didn't get full coverage from the painter. Remember, this thing was coming down the line and got painted pretty quickly, so some bare spots and drips are always present. I left the oil pan's bottom natural steel then hit it with some overspray and a little drip action. So much fun for the details. But one thing I did not do was replace the oil pan. This pan is actually for a Hemi car, and is a larger capacity. The correct one for my car is stamped with a "402" on the underside. I plan on driving the car and doing some track time with it when done (I know...even more fun!!!) and I don't want oil starvation to be an issue when zooming down the track at wide open throttle. So I'll take the point hit for this. But, Pure Stock and FAST allow this mod to be done. A little insurance against oil starvation.


Here's the oversprayed cylinder lettering. You can barely see the underlying grease markings. I sourced out a date correct exhaust manifold on the passenger side with a min heat riser, so that part is now done. The other part I was missing was a correct 060 fan clutch. Tony's Parts makes a dead-nuts accurate clutch with the right stampings. You can see that below. Oil filter, fuel hoses, and PS hoses/clamps to go!

The last few motor parts will be rolling in next month and then it's onto the front suspension.


Carbs in place, fresh back from the rebuild shop and I'm going to be painting the air cleaner shortly. This will wrap up the engine/transmission assembly!


Time to jump in on the body. I met a guy that does the dustless blasting and had him out to the shop to blast the Bee. The place I normally go to closed up, and the other guy I used is back logged for months. This isn't exactly the most ideal way to blast, but as you can see below, it came out great!


And what I meant by the most "ideal" way to blast is that I was left cleaning up the mess all the next day! But, it's done, and now I need to get her into epoxy and then off the twirler so I can start yanking off the quarter panels and replace the rotted metal. I didn't have him blast the quarters, front floor pan, or rear crossmember since those will be replaced. What he did was the front engine bay, all of the underside, door jambs, and window channels.


After some vacuuming, several passes with the air hose, a leaf blower, and about one hundred spins on the rotisserie, I think I got most of the sand out. Time to prime!!!
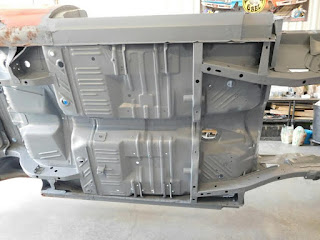

DP50LF Epoxy, and two heavy coats. Everything but the quarter panels got sprayed.


After having the trunk blaster I'm excited to say it'll stay in the car! It's going to take some bodywork, lots of pitting, but it's still solid with only a few pinholes to weld up.


Back level, and once I get the floor patches, quarters, and other small items replaced I'll hit it again with another coat.

I was thinking of the original owner today, so I decided to write a little note to him. Gary's right beside me all the way watching his car come back to life! All previous owners names listed: me, James Tait, Steve Atwell, and Mike Wagner.


47 years of Michigan rust blasted clean from the springs. New lingers, pads, bushings, clamps, and retainer bolts make these bad boys look new again!

About ready to install the clamps. Tricky, and with new liners and pads, the springs are spaced a little farther apart which makes getting the clamps snug a little more difficult.

But, a little persistence pays off! Here they are done with proper spring rate marks for the S15 suspension which all A12 and Hemi cars came with. 6 leaf and 5+2 half leafs.


Front suspension with all new balljoints, bushings, and shock mounting hardware. I have the sway bar done as well, just not mounted up.

The front end assembly is done! I'm awaiting a few more detail items for the engine: solenoid wire clip for the valve cover, A12 specific air cleaner decals, and the right angle drain hose for the air cleaner driver's side rear drain port. So with the mechanics all done, it's time to get back into the bodywork!

So the main idea behind all this upcoming bodywork you'll see is to keep as much of the original metal intact as I can on the car. Anyone can replace the metal with aftermarket stuff, and while the aftermarket parts are high quality AMD pieces, it's still not Mighty Ma Mopar Metal! So I'm trying to do my best to save as much as I can. On the quarters, I was able to save both by replacing only the extreme lower parts. And the best part about that is I was able to hide the spliced metal line below the trunk floor so you can't see where the old meets the new! In addition, it saved the factory sound deadner to boot!


Here you can see the new trunk extension clamped in place.

And here it is welded in along with the lower quarter panel patch. Notice you don't see the line where the splice was done! It's below the trunk floor by a few inches, so you can't see it when looking inside the trunk.


Now, this side required a lower rear quarter extension, front wheel well patch as well as an upper wheel arc patch. On top of that, some of the outer wheel house needed patching too. A lot of work, but once again, I saved the factory quarter panel!

Same as the other side, no seam! I also replaced the front driver's floor short pan and also able to splice the pan in on top of the torsion bar crossmember and front toe board to firewall joint so no seam visible.


Now that all the metal work is done, it's door alignment time! It's pretty close. The passenger door needs to come up another 1/8th of an inch and I'll be line up nicely!

And here we are! All the metal work is DONE DONE DONE!!!! The car is 100% solid again!!!

So where do I post my excitement about this picture? I know! RIGHT HERE!!! That's Gary's lovely daughter, Kristen, who I had the pleasure of meeting last month. I was so happy to show off her Dad's old car to her! Thanks for coming out, Kristen, and can't wait for you to get back down here and help with the reassembly!!!


It was so awesome seeing her look over her Dad's car. I'm really looking forward to her being able to sit in it later next year! Her and her brother, Jeff, are going to be at the unveiling next year in Chicago with other family members present too.

Just like her Dad did, Kristen is ready to take her for a spin!!!! Just a few more bolts!! :-)


Alrighty, the work continues! I'm reconstructing the lost body lines. Super Bees have this mid quarter panel body line that usually disappears over time with dents, dings, and repainting. This one was no exception. So I started by masking off the line and using some glaze over the tape. Remove the tape and you're left with a crisp line. Knock that down with 180 grit to start, prime, and you're left with what you see below: a crisp fresh body line!

Now THAT'S a crisp quarter panel the way Mopar meant it to look!

In keeping with saving the original metal, I have been diligently working the trunk with fill, primer and a buttload of sanding! I don't know if buttload is one word or two, but it's taking that much work to get that trunk looking good! I'm 80% there. I'm not filling in the spot welds (the small circles you see) rather, I'm filling in the craters left over from blasting out the rust. The center part of the pan needs to be smooth as does all those long reliefs. They're all pitted beyond belief. It actually would have been easier to replace the trunk floor, but again, I wanted to save the original metal as much as I can.


Another round of blocking and priming. The door latch is in place, but the handle is removed so the door isn't flopping around when I sand. I now have the door lined up exactly how I wanted it to be and the body lines match up with all the "before" photos. Plus, it latches with just a slight push!


Another round of primer and now you can see how nice that center body line came out!

OK, back on the trunk for another filler round. I'm VERY happy with how it's coming out in there. Time to jump on the other side of the car.

Trunk is about 95% there! Only a few more divots to fill in. I decided to take a quick break from the bodywork and do what else? Work on the brakes! Actually, the clutch and brake pedal quadrant. Notice the inspection mark on the spring. I think that this color signifies that it's a B-Body pedal assembly but I'm not sure. Either way, it goes back at the end.


I disassembled all the parts and blasted them clean. This whole thing is actually bare metal with only the lower portions of the pedals dipped in black paint.


Clean and detailed parts, and reassembled with the inspection mark put back on. The brake a pedal pads were in really good shape so until I order new ones, the originals go back on. I think I may just keep them on there so that way everytime I depress that clutch pedal Gary will be shifting gears with me!!!

The black coating you see on the quarters is guide coat. It's a graphite powder and you apply that to the panel and then block sand. Any low spots show up black so you know where to sand more or spot fill.


After all that sanding and blocking, here's the end result. The mid-quarter body line is back and I'm very happy with the overall package right now. So what to do next? Simple! Get out the blue painter's tape and go around the car and find the divots, nicks, scratches, and voids I missed.


As you can see, there's a ton of blue tape marks! I'll do this about three more times before I'm ready to paint. Man...this was a 55hr week of sanding. Time to take the weekend off! This is my vacation this month and I think I need to go back to work to get a break! More to come next week as I get close to painting the jambs, trunk, interior, and engine bay!!!


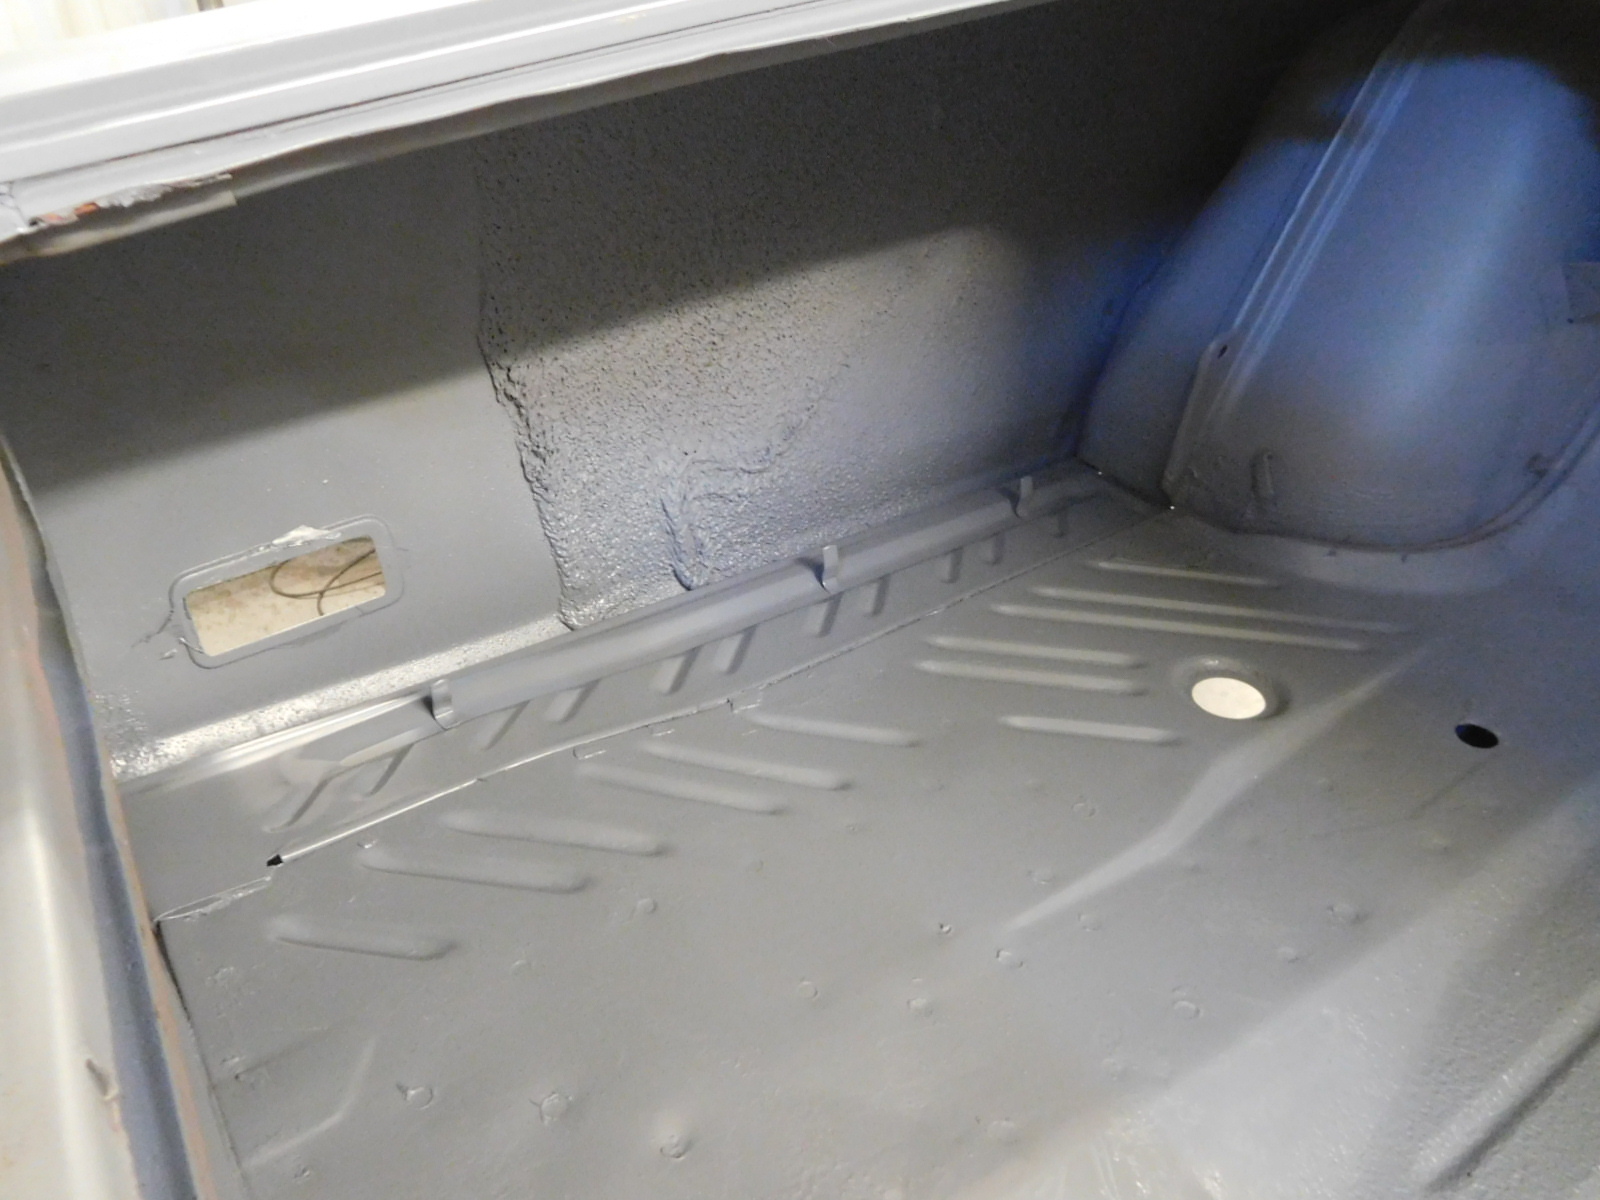
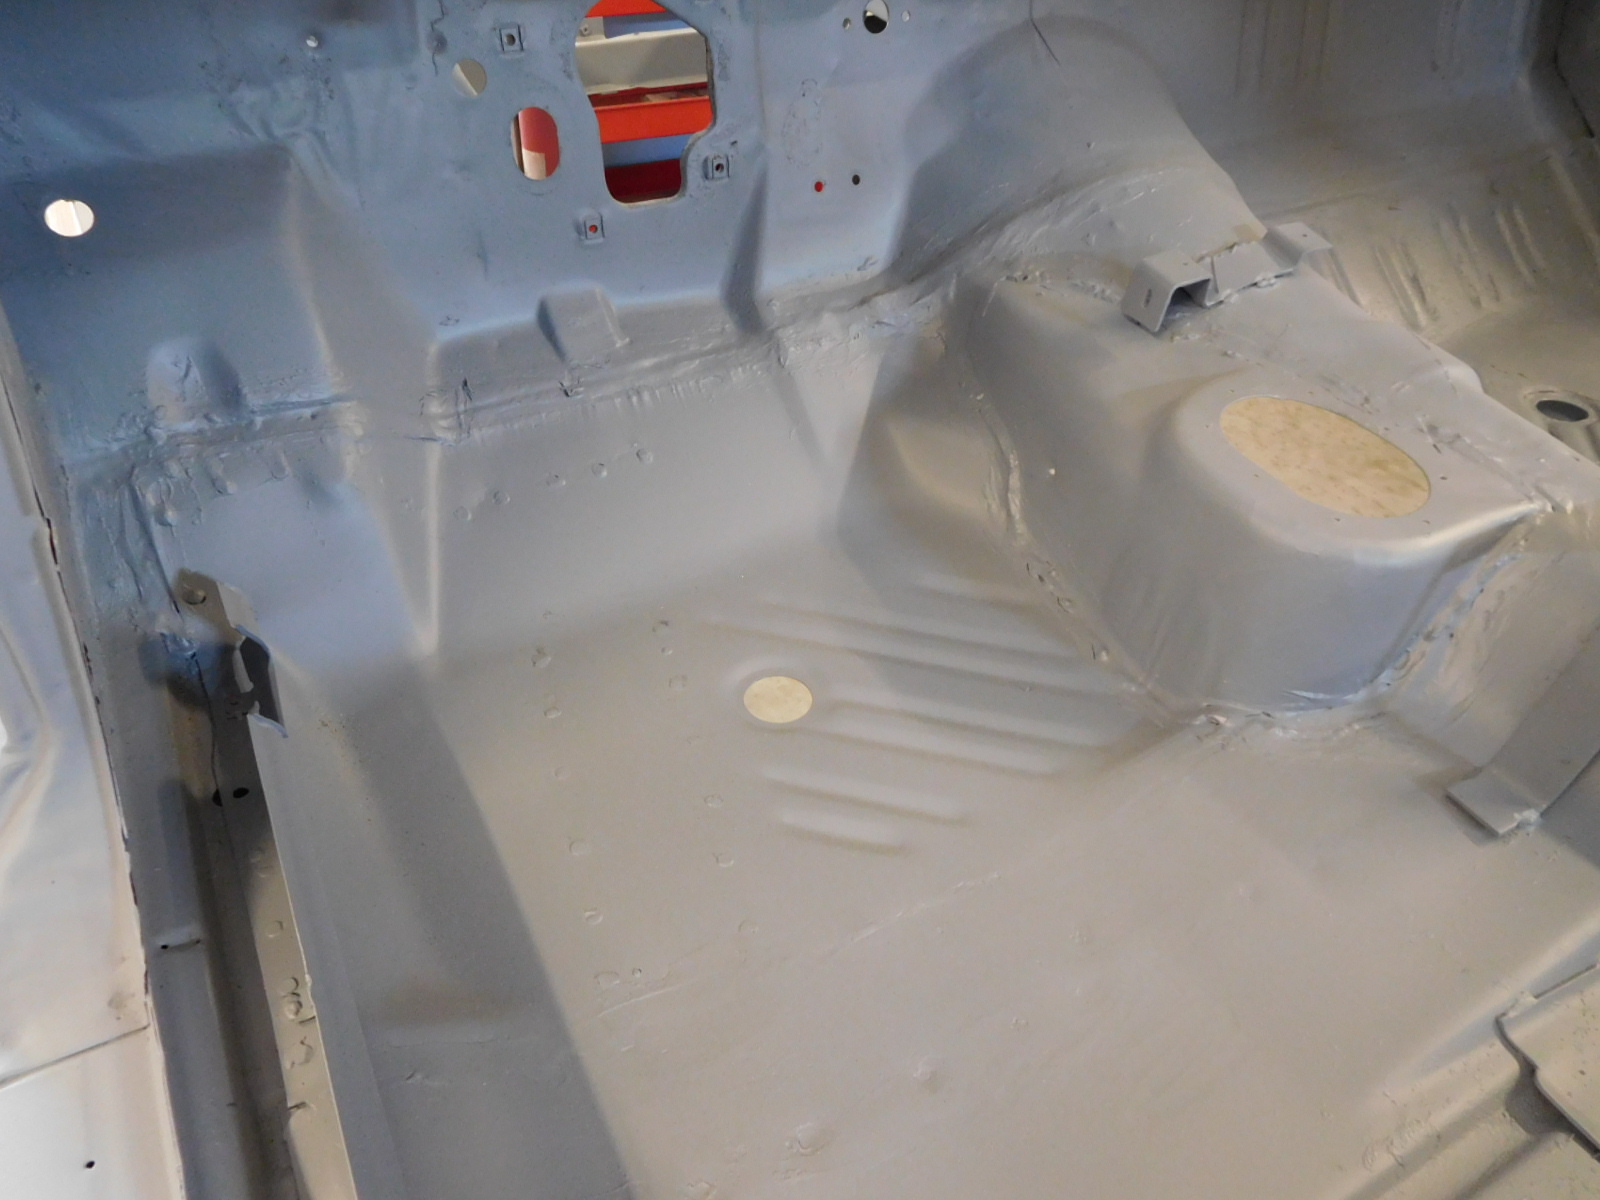
I'm wet sanding with 400, a wash, then I'm ready for paint! I'm going to be doing this in stages so it's going to be a 4-day process. I mixed up the proper shade of dip gray primer and the entire car will be sprayed in that color so any unpainted parts will show the proper color primer underneath. The biggest area will be the undercarriage. I'm going for the factory look with an overspray pattern so this will give me the look I'm after.


And here we are with the proper overspray pattern replicated! Amazing how much time it takes to replicate something the factory did in about :30 minutes!


I painted the interior, trunk, and engine bay after the overspray pattern was complete. I was able toy mask off the engine bay in an area where there is no seam visible.

I painted the hood pins since I had the hood perfectly aligned prior to painting and didn't want to go through that hassel after it was painted. I'll glass bead them and then polish the posts after the paint cures.

TA-DA!!! Fresh V2 Hemi Orange!!!!!

Time to wetsand and buff. And then I can get started with the reassembly. Notice the V02 option I put on it until thr vinyl top is installed. V02 is the fender tag code for a black painted top.


Reassembly begins and with the parts already done it goes together pretty quickly.

Heater box, pedals, wiper linkage, firewall insulation, cowl insulation all installed. Next thing is the parking brake lever, cables, and equalizer.


Rear axle installation!


So it's official: The Beater Bee is off the rotisserie!!!!


Engine going in! Man, it's just non-stop around here!!!


So what do you do after this monumentous event? Easy! Strike a few poses!!!!!


So much Hemi orange! Now the tedious stuff of connecting everything. The radiator is out to Bob at Glen-Ray to get freshened up, I'm waiting on the wiper motor to come back next month before I can install the dash, and the grille/headlight bezels and tail panel should be back in January too. Meanwhile, I dropped off the chrome and stainless and that should be back in a few weeks.

The rest of the suspension parts laid out ready for reassembly.

Time for a coiffee break! Yeah, a Chevy mug.....gotta spread the love all around! ;-)
OK, been busy and time for a Blog-a-Roni update! Lots been done and lots to update. So here's the latest!

I stamped the trunk mat with the proper numbers. You'll never see it, but still, it looks cool!


Trunk finished off. I detailed my spare tire like the 5600 Mile Survivor Bee, and added the same markings, pink paint blop, and "104" sticker too.


My tire above..................Survior Bee spare tire above

Front suspension done, all proper markings, coatings, etc. Once I get everything set up here and in the back I'll spray the undercoating in the wells.

New edge seal weather stripping in the door glass going in...


This side is done! And sadly, this required a trip to the Emergency room. That's best told over a few beers, but all is OK (now) and I'm back at it! I laid the vinyl top on in preparations for it to be installed in January. Well, it's January, so it's time for it to go on! But first, carpet time!


A heat gun, glue, and some stretching and it's all fit up nice and snugley. I used the survivor Bee for a template as to where the cuts, heel pad, and accelerator pedal position are exactly. The result is a perfect fit.


Healdliner insulation installed, and these are the original door panels!

Carpet all snug and the shifter installed just waiting to be rowed through the gears!


Console is done and installed. I am not overly happy with how the glovebox door lines up, so I'll be adding some shims to fix that problem, But it looks stunning!

Vinyl top time!


First I scuff up the roof and remove any numbs that may be there from painting. Then I start gluing it down and stretching it out.


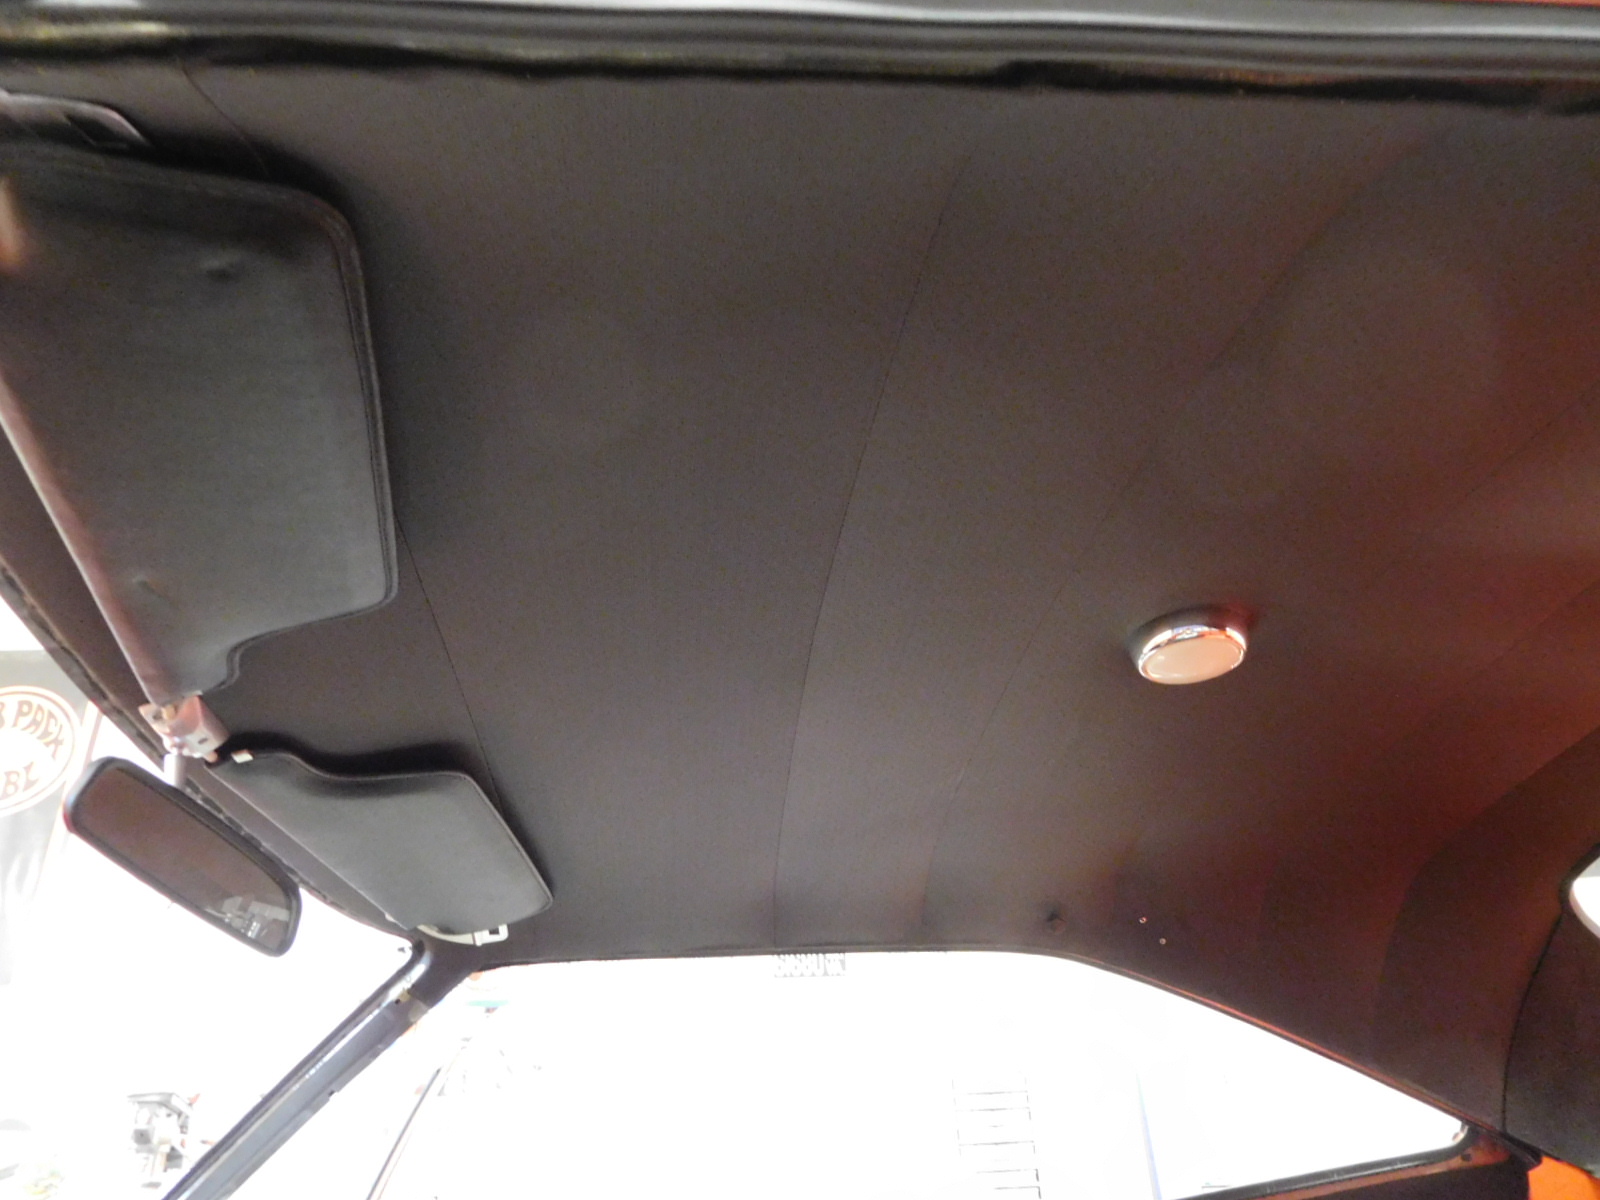
Top done, and headliner is just about done. I reused the sunvisors too, but the driver's side one has two indentations in them from storage. If they don't come out by the show in November, I'll be replacing them.


Rear package tray installed, rear seat belts, and upper rear seatback. That's the original side panels and original back seat upholstery!!! Original lower seat will be installed when I get it cleaned up.

Rear bumper, exhaust tips, and correct clamps.


Front bumper going in. So far, I've reused the following original soft parts from Gary's Super Bee:
Front Door Panels, Rear Interior Panels, Rear Seat Upholstery (both upper and lower), Rear Package Tray trim, Upper Headliner Trim, Inner rear quarter window Fuzzies, All Seat Belts, All Pedal Pads and Trim, Shifter, Shifter Ball, Dash Pads (main pad, glove box, and two center/driver pads), Sunvisors.
I plan on fixing the steering wheel (it has a crack at the 12 O'Clock position) so that when I drive it, I'm shifting, steering, and braking with the same parts Gary was using back in the day cruising up and down Woodward Blvd.


Time to install the dash and steering column. I recovered the passenger seat bottom, but reused the upper seat upholstery with a new headrest and bezels for a fresh look. Other than the Driver's seat and passenger upper seat back, all the upholstery is original!


Dash installed and the column is in! All factory tags under the dash are intact!!!!


As a side project, I decided to make my own L-72 assembly line oil filter for my Bee since it's restored to an "off the assembly line" condition. This filter was olive drab in color, had the Mopar logo in it, instructions, and an a raised, embossed, "M" on the top as well as a textured, no slip, finish. To find one of these you're easily looking at $1,000. And no way I'm putting on a almost 50yr old oil filter on my car. So I had some dry transfers made up of the logos, worked some wonder with paint and media, and came up with my own! Pretty darn close!!! The color may be a shade dark, and it needs to be flat, not glossy. But this was the first prototype.

It gives the me that final, correct, and usually never seen, item I needed to cap off the entire engine bay.

Undercoating in the wheelwell time! First step, mask everything off!


You can see the sloppy pattern. Brake lines, fuel lines, front leaf spring bolts, all get a splattering of the goopy junk. And like the body paint overspray, there is a distinct overspray pattern with this too.


Factory correct slop!!!! UGH!!!!


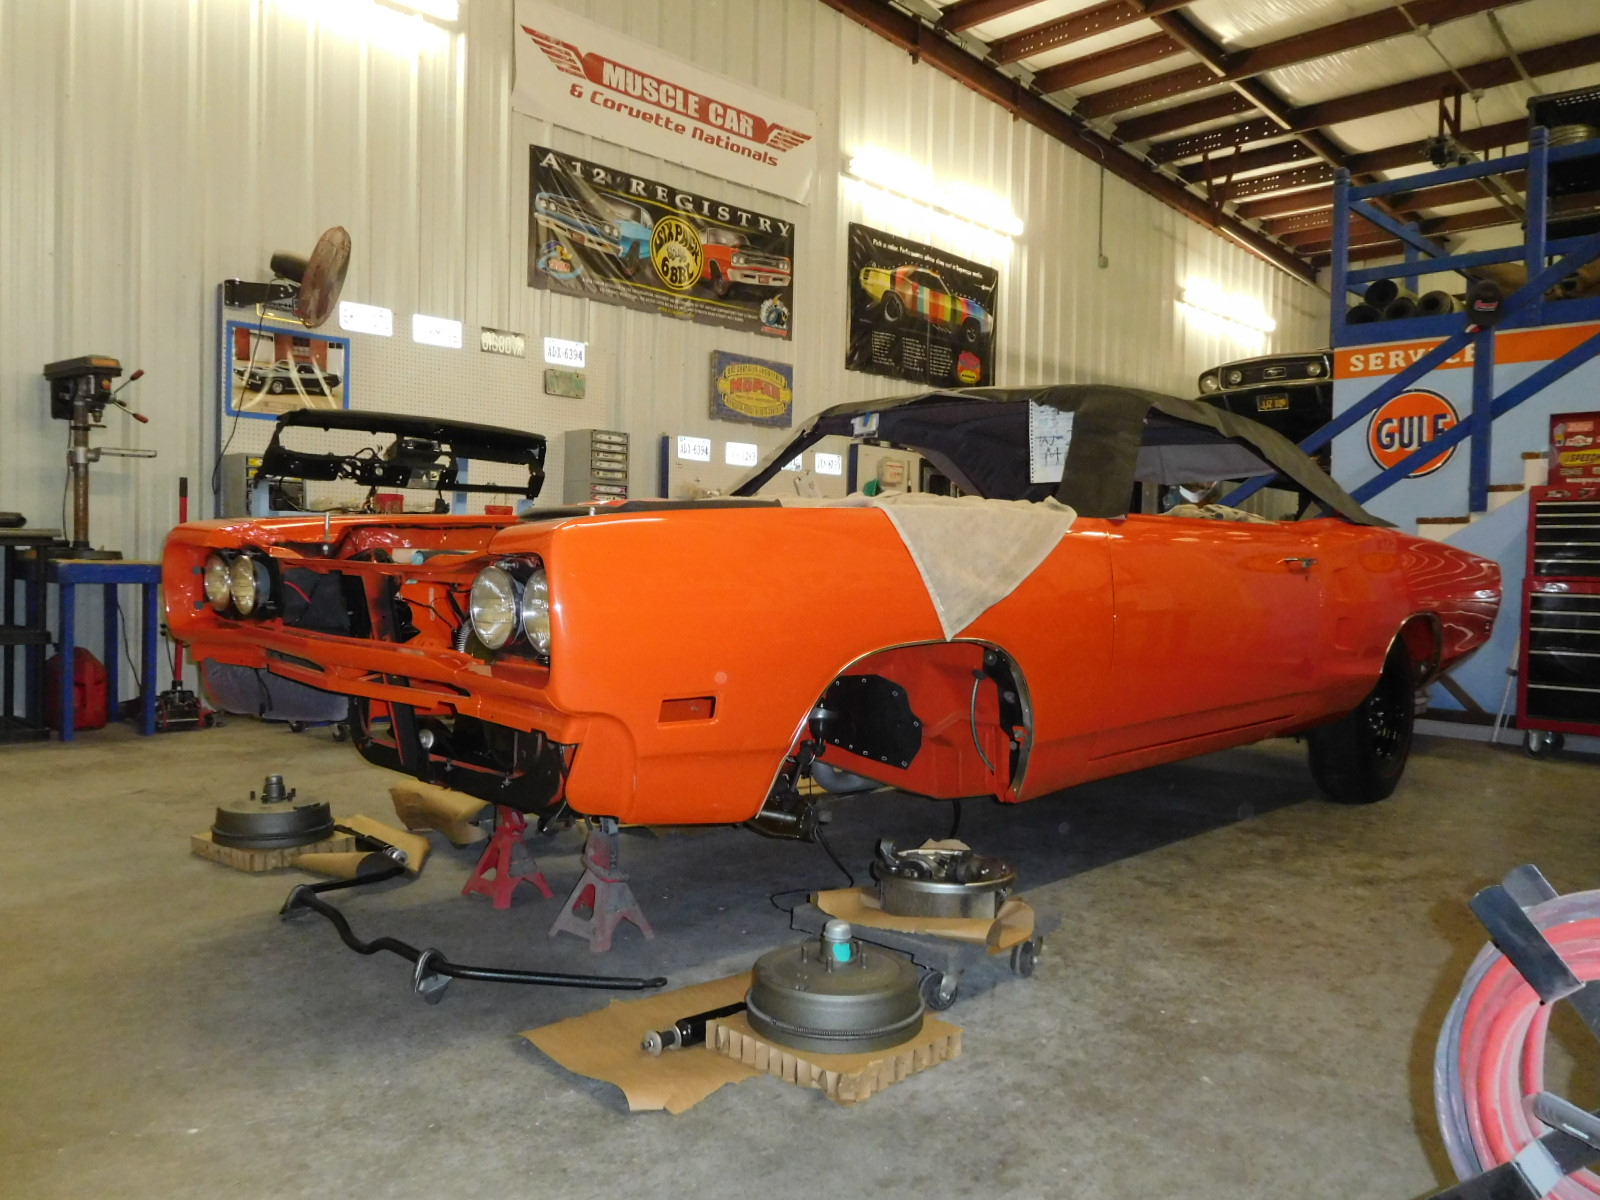
The grille is back as is the tail panel from Shine on Me restorations in California. That in conjunction with NOS 1969 Headlinghts, the front end is looking sharp!!!!

Battery hooked up and on the first try everything worked!!! All lights, radio, fan, even the newley replaced clock! Very excited!!!! And the best park is I turned the key and she cranked right over. No radiator yet or gas in the tank, so the BB didn't fire off, but soon......


I made the ever-so-elusive tail panel screw caps that are installed on the exposed screws on the midsection of the tail panel in the trunk. To find them is like a hen's tooth, so I made them and you'd be hard pressed to see the difference next to the real ones. Green writing on the coil, Voltage regulator warning stenciling, brake line/heater box bracket also installed, overspray on the engine ground strap. Small details, but they all add up!

The interior is done, but you'll notice the brake pedal to the floor. I was crawling under the dash to make sure they routing of the wires were correct and noticed the master cylinder leaking. Not exactly the easiest thing to reach, but it's out and I'll be rebuilding that this week. A minor setback, but luckily no damage!


I had to do some fiberglass work on the hood. Pitting, scratches, and a big ole' chunk that Gary took out of the hood one night when he slid off Woodward Blvd in the show and took out a mailbox. Now that its' all done and sealer, I'll test fit to the car one last time and then shoot the textured black coating! Glass goes in Friday!!!!!! The 10th will be exactly 2yrs since Gary and I took the aircleaner off and started the restoration. I'm hoping to have it wraped up just before that day. More to come this week!!!!

In keeping with the finer details......painted trunk grease! Don't believe me? Here's the orginal, each side below:


What's an authetic restoration without proper slop!?!?!?! More to come....
It's alive! Only a stripe left! More to come...
https://youtu.be/i8xqMmk5Bro
Enjoy!
The Bee is DONE!!!! Well...sort of. There are two parts I'm wanting to be perfect for the show, and that's the driveshaft and the exhaust. I'll install those new parts more closer to the show. But in the meantime, the car is done and it's ready to be driven!!!!! What a hard thing to do since I don't want anything to happen to it before November. I'll be trailering it down to the Hemi Hideout for some great photos next month and will post more then. In the meantime....here's the car DONE!!!


It's been such a fun journey having connected with the son and daughter of Gary, the original owner. I can't wait for them to see the car in person in November. More pics then!!!!


The unveiling was such a blast! Kristen and Jeff loved the car and for me, that was worth more joy than any gold award could ever give! They even used my car as the Ticket Car picture!! It's so awesone!
Thanks for following along!